I think automating some aspects of email marketing is nothing new to ecommerces. At least all ecommerces have a basic Marketing Automation strategy in place.
When you buy something you’ll receive and email with information about the purchase. If you start the steps to purchase but leave without buying you’ll receive and email asking you to go back to finish it. During the week you’ll receive emails recommending other products.
This is pretty common, isn’t it? It is.
Although this kind of automating demands some intelligence and a good email software, there are a lot of other things you will only accomplish with a Marketing Automation Platform.
You can go beyond getting information only when someone buys a product. You can create other ways to collect email information from your visitors and then start recommending products based on their behavior on your online store.
Imagine, you can target users that visited a specific category of product and engage them to go back to your store and buy something they might need and like.
Think about all those people that bought a product once and never came back to your store. You have buyers that fit this description, don’t you? You can target them too.
To take your e-commerce marketing strategy to the next level using Marketing Automation you just need to start taking 4 simple steps (after that you can think about more complex things to do):
First Step: Identify your leads
Let me guess something: you probably only collect users emails when they have to create an account to buy your product, don’t you? Even if you do have a newsletter form you don’t put much effort in making people leave their emails there, right?
If the answer is “yes” to both questions don’t worry, you’re not alone. A lot of ecommerces are in this same situation. They target people only if they ever bought something.
The trick here, to get all the benefits from lead nurturing to engage top and middle of the funnel leads is to collect your visitor’s emails in different contexts, offering valuable content that will make them engaged with your store and encourage them to choose your products, not your competition’s.
If you have forms on your store to collect emails for product information, newsletters and account creation/login you can use Route’s form mapping feature to easily send contact information to Route.
It’s as simple as this gif shows:

After mapping your forms you can create some automated campaigns. One that is nice to create is giving welcome to all newsletter subscribers.
You can use the welcome message to offer a discount for the first purchase, recommend different products of your store (this is more tricky to get it right, but you can use to collect more information about the person. Just add products from different categories with UTMs on the url. With this information you can know in advance, without the user buying anything, more about their interests) or just spread the word about other marketing channels you are using, like, Facebook, Pinterest and Twitter.
For those leads that are more on the bottom of your funnel (e.g. the ones that created an account indicating they might want to buy something) you can create a flow of messages (e.g. email and SMS if you have their phones) to start a week after someone completed the registration but never bought anything.
These are some ideas to help you think about different flows of engagement, not only the classic transactional email after a purchase with a receipt or recommendation emails based on purchase history.
After you identify your users with your forms you can create some campaigns, but things get more powerful once you have contacts identified on Route and you are tracking their behavior across your store.
This takes us to the second step.
Second Step: Track their behavior on your site
Among all the events you can track on your site, the most important ones probably are the pageview of the shopping cart screen and the pageview of your success page after a purchase. Knowing that people are actually adding products to their cart and finishing the process of buying is a good way to measure success.
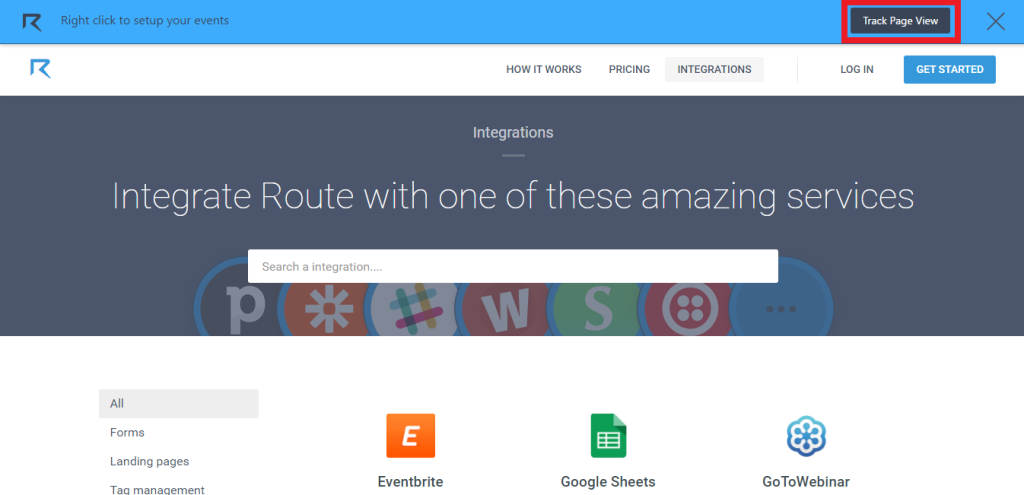
With other tools you’d probably have to ask your developer or a technical person to do some complex Javascript/API (or any other programming language) integration. With Route you can do it with the click of your mouse.
Route has something called Visual Mode, that opens you’re site and let’s you track pageviews and events (more about this later). Here’s a screen shot of how to track a pageview:
With the pageview of the shopping cart page you could create a campaign to target people that added a product to their carts a day ago, for example, but didn’t complete the purchase. This is the classic cart abandonment campaign, to bring back those people.
But you don’t need to rely only on pageviews, you can track clicks on specific links/buttons on your store. Not every click will lead the user to a new page, so tracking the actual behavior of clicking matters a lot. With Route’s Visual Mode you can do that too. Here’s an example:
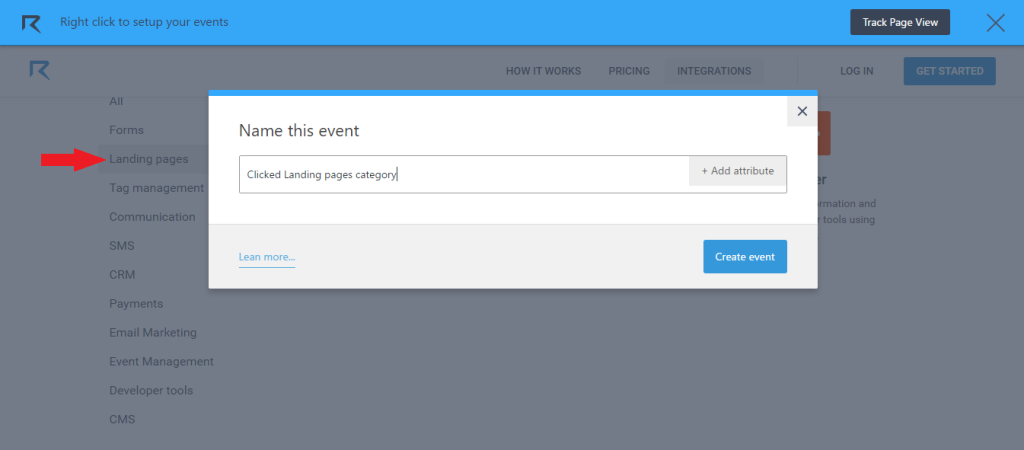
You could use this to track when someone clicks to check your products image or information that open in the same window and don’t take the user to another page.
Once you engage with your users based on their behavior and they ended up buying your product, it’s time to use this information to enrich your users profiles.
Third Step: Track your sales conversions in Route
The previous two steps are simple to implement. You can do by yourself in a matter of minutes, but integrating your payment system to Route can become complex.
If you have a technical person to help you or if you are the technical person, you can use our robust API HTTP to send Route payment information via backend to Route, whenever a payment is processed. In many cases this will be needed to make this integration with Route.
But, if by chance you use Stripe or any other payment/billing system that has an integration with Zapier, you can connect them to Route with no coding required.
With the information about the purchase you can create campaigns targeting people that completed the process sending the information about the product and recommending others.
You can target people that completed the process but never triggered the event of actually completing the purchase that you collect on your payment/billing system. This is a situation that can happen specially if you have an option that people can choose to buy your product by paying with money on a bank (in Brazil is common to offer this possibility).
Now that you collected information about your leads it’s time to send them the best campaign. This means one thing: highly personalized messages.
With a Marketing Automation Platform like Route you can forget about the spray-and-pray tactic. Focus on the 1-to-1 marketing.
Fourth Step: Segmentation and marketing 1-to-1
When you collect leads into Route, they are all considered contacts. You’ll have a long list of contacts. But this long list is a dynamic list.
This means that once you create campaigns and set the rules to start the campaign Route will create smaller lists of contacts that match the criteria you chose. With one big list of contacts you’ll have the possibility to divide them into really segmented dynamic lists.
All you have to do to make this happen is creating rules to start campaigns based on people behavior on your store and their characteristics.
As you are able to have this deep segmentation you can create your 1-to-1 marketing campaigns. Think of mass customization.
Although you’ll be targeting a lot of people, each one of the will receive a message with the right information about them.
This is possible because every data that you collect about your users, Route process them as attributes and you can use different variables on your email messages.
In Route there are attributes for contacts and for events.
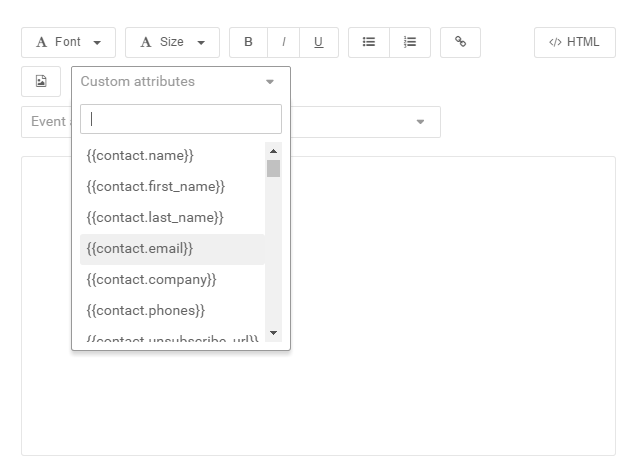
Contact attributes are the ones you collect through forms on your store, by importing lists or when you send contact information from other applications to Route. Those will be information about who your contacts are. This is how contact attributes are displayed when creating an email:
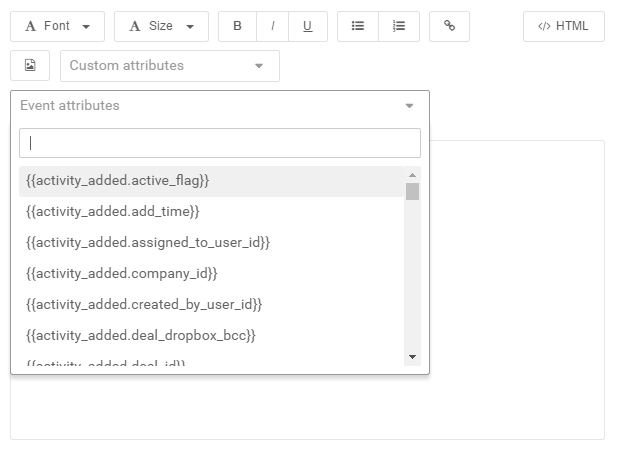
Event attributes are the ones you can send when you track an event. Those attributes will give more details about the event performed by your leads and visitors. For example, when someone triggers the event of purchasing a t-shirt you can send data about the color, size and price of the product. This is how event attributes are displayed when creating an email:
Then, when creating the campaigns and writing the emails, you can use all those data to make your campaign and message more personalized.
Using this information is possible because Route uses liquid to serve as variables to be replaced by the attributes you’re collecting.
What’s next?
Once you have Route integrated with your site you can use your creativity and do amazing things to engage your leads and customers. I’m sure you have cool things in mind!
Not using Route yet? You can start by registering and checking what Route can do for you.